Description
-
Model List:
- 1025 Integral 2 Row Planter
- 1. Introduction
- 1.1. Foreword
- 1.2. Product View
- 1.3. A Message to Our Customers
- 1.4. Preliminary Checks
- 1.5. Regions and Country Versions
- 1.6. Machine Overview
- 1.7. Recognize Safety Information
- 1.8. Understand Signal Words
- 1.9. Follow Safety Instructions
- 1.10. Prevent Machine Runaway
- 1.11. Operate Machine Safely
- 1.12. Keep Riders Off Machine
- 1.13. Avoid Tipovers
- 1.14. Prepare for Emergencies
- 1.15. Wear Protective Clothing
- 1.16. Handle Agricultural Chemicals Safely
- 1.17. Use Safety Lights and Devices
- 1.18. Transport Safety
- 1.19. Tow Loads Safely
- 1.20. Comply with the Transport Speed Limit
- 1.21. Service Machine Safely
- 1.22. Practice Safe Maintenance
- 1.23. Remove Paint Before Welding or Heating
- 1.24. Avoid Heating Near Pressurized Fluid Lines
- 1.25. Avoid HighPressure Fluids
- 1.26. Store Attachments Safely
- 1.27. Decommissioning Proper Recycling and Disposal of Fluids and Components
- 2. Safety Signs
- 2.1. Safety Signs
- 3. Preparing the Tractor
- 3.1. Use Your Tractor Operators Manual
- 3.2. Check Tractor Hydraulic System
- 3.3. Front Counterweight
- 3.4. Rear Wheel Counterweight
- 3.5. Determining FrontEnd Ballast Without Implement Codes
- 3.6. Sway Blocks (If Installed)
- 3.7. Stabilizer Bar (If Installed)
- 3.8. Center Link Adjustment
- 3.9. Lift Links
- 3.10. Vertical Float Adjustment
- 3.11. Rockshaft Draft Control
- 3.12. Preparing Tractor Drawbar
- 3.13. Check Tire Inflation Pressure
- 3.14. Setting Position Control Lever Stop
- 4. Preparing the Machine
- 4.1. Tightening Hardware
- 4.2. Wheel Bolt Torque
- 4.3. Check Tire Inflation Pressure
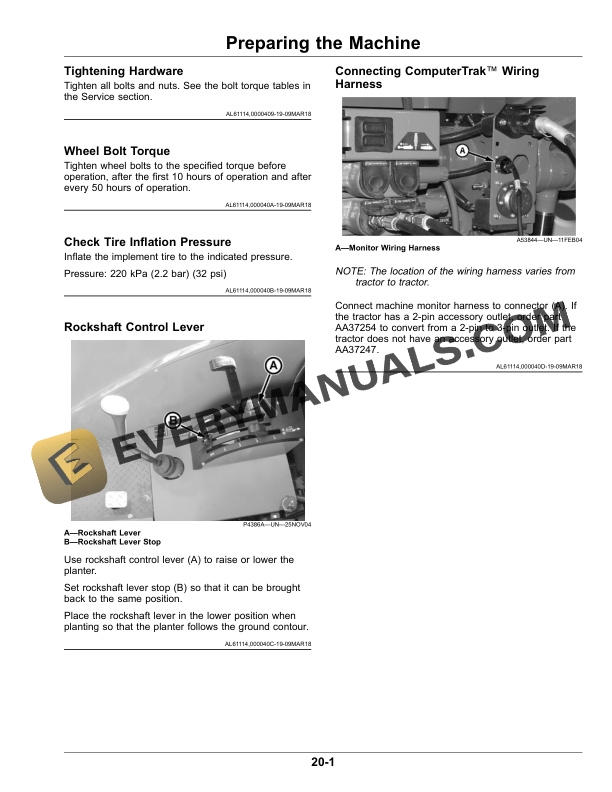
- 4.4. Rockshaft Control Lever
- 4.5. Connecting ComputerTrak Wiring Harness
- 5. Attaching and Detaching
- 5.1. See Tractor Operators Manual
- 5.2. Tractor ThreePoint Hitch
- 5.3. Install Rockshaft Hitch Pins
- 5.4. Attaching Planter to Tractor
- 5.5. Detaching from Tractor
- 6. Transporting
- 6.1. Transport Safely
- 6.2. Transporting
- 6.3. Sway Chains or Blocks
- 7. Operating the Machine
- 7.1. General
- 7.2. Adjust Planting Depth
- 7.3. Adjust Closing Wheel Down Force
- 7.4. Centering Closing Wheels
- 7.5. Adjust Closing Wheel Spacing
- 7.6. Closing Wheel Offset
- 7.7. Seed Disk Installation
- 7.8. Replace Meter Housing
- 7.9. Seed Meter Information
- 7.10. Seed Meter Operation
- 7.11. Seed Disks
- 7.12. Row Crops
- 7.13. Use of Talc Lubricant
- 7.14. Unit Mounted Opener Disks
- 7.15. TruVee DoubleDisk Seed Openers
- 7.16. Filling Seed Hoppers
- 8. Checking Seed Population
- 8.1. Seed Population
- 9. General Attachments
- 9.1. General
- 9.2. Seed Tubes
- 9.3. Heavyduty Scraper
- 9.4. Heavyduty Downforce Springs
- 9.5. Closing Chain
- 10. Assembly
- 10.1. Installing Support Stand
- 10.2. Attaching Planting Unit to Main Frame
- 10.3. Hex Drive Shaft
- 10.4. Install Monitor Harness
- 10.5. Seed Hopper
- 10.6. Furrow Opener Disk
- 10.7. Opener Disks
- 11. Troubleshooting
- 11.1. Seed Meter
- 11.2. Cutting Disk
- 12. Lubrication and Maintenance
- 12.1. Safe Lubrication and Maintenance of the Machine
- 12.2. Lubrication and Maintenance Procedures
- 12.3. Lubrication Symbols
- 12.4. Alternative Lubricants
- 12.5. Practice Safe Maintenance
- 12.6. Service Tires Safely
- 12.7. Supporting Raised Machine
- 12.8. Lubrication and Maintenance Chart
- 12.9. Lubrication of Seed and Sprocket
- 12.10. Hour Lubrication
- 12.11. Hour Lubrication
- 13. Service and Adjustments
- 13.1. Service Intervals
- 13.2. Using Safe Service Procedures
- 13.3. Practice Safe Maintenance
- 13.4. Metric Bolt and Screw Torque Values
- 13.5. Unified Inch Bolt and Screw Torque Values
- 13.6. Tightening Wheel Bolts
- 13.7. Tighten Drive Chains
- 13.8. Checking Bearings
- 13.9. Check Tire Inflation Pressure
- 13.10. Support Machine Before Service
- 13.11. Changing Row Width
- 13.12. Row Width Change Tables for 2Unit Planter (2 m Main Frame)
- 13.13. Clean Seed Tube Sensor
- 13.14. Coulter Maintenance
- 13.15. Inspecting and Adjusting Opener Blades
- 13.16. Replacing Seed Opener Disks and Seed Tube Guard
- 13.17. Adjusting Gauge Wheels
- 13.18. Servicing Wheel Bearings
- 13.19. Closing Disk Attachment
- 13.20. Drive Wheels
- 13.21. Install and Remove NonStandard Seed Tubes
- 14. Storage
- 14.1. Keep Your Planter Ready
- 14.2. Check Hardware and Worn Parts
- 14.3. Protect Closing Disks, Openers, and Coulter with Grease or Oil
- 14.4. Press Wheel
- 14.5. Preparation for Storage
- 14.6. Removing from Storage
- 15. Specifications
- 15.1. Specifications
- 15.2. Serial Number
- 15.3. Keep Proof of Ownership
- 15.4. Keep Machines Secure
- 16. John Deere Service Keeps You On The Job
- 16.1. John Deere Parts
- 16.2. The Right Tools
- 16.3. WellTrained Technicians
- 16.4. Prompt Service