
Description
-
Model List:
- 1200A Bunker Rake
- 1. Introduction
- 1.1. Thank You for Purchasing a John Deere Product
- 1.2. Using Your Operators Manual
- 1.3. Machine Use
- 1.4. Special Messages
- 2. Contents
- 3. Product Identification
- 3.1. Record Identification Numbers
- 4. Safety Labels
- 4.1. Safety Label Location
- 4.2. Pictorial Safety Signs
- 4.3. Read Operators Manual and Never Carry Riders
- 4.4. Avoid Injury From Moving Tines
- 4.5. Drawbar Load
- 4.6. Operator Training Required
- 4.7. Operating Safely
- 4.8. Using a Spark Arrestor
- 4.9. Parking Safely
- 4.10. Checking Work Area
- 4.11. Protect Children and Prevent Accidents
- 4.11.1. Protect Children
- 4.11.2. Help Prevent Serious Or Fatal Accidents
- 4.12. Avoid Tipping
- 4.12.1. Identify Slopes for Safe Operation
- 4.12.2. Operate Safely on Slopes
- 4.13. Keep Riders Off
- 4.14. Towing Loads Safely
- 4.15. Checking Wheel Hardware
- 4.16. Wear Appropriate Clothing
- 4.17. Practice Safe Maintenance
- 4.18. Avoid High Pressure Fluids
- 4.19. Prevent Fires
- 4.20. Tire Safety
- 4.21. Handling Fuel Safely
- 4.22. Handling Waste Product and Chemicals
- 5. Operating
- 5.1. Daily Operating Checklist
- 5.2. Avoid Damage to Plastic and Painted Surfaces
- 5.3. Operator Controls and Display
- 5.4. Platform Controls
- 5.5. Testing Safety Systems
- 5.6. Testing Neutral Start System
- 5.7. Using Park Brake Lock
- 5.8. Using The Cultivator
- 5.9. Using The Rake
- 5.10. Using Front Blade
- 5.11. Starting The Engine
- 5.12. Warming and Idling Engine
- 5.13. Stopping Engine
- 5.14. Using Gear Shift Pedals
- 5.15. Using Accelerator
- 5.16. Using Brake Pedal
- 5.17. Using Differential Lock Pedal
- 5.17.1. To engage differential lock (A)
- 5.17.2. To disengage differential lock
- 5.18. Using Headlight Switch (If Equipped)
- 5.19. Using (Optional) Spiker
- 5.20. Checking (Optional) Spike Operation
- 5.21. Operating (Optional) Spiker
- 5.22. Transporting Machine
- 5.23. Transport Loads Safely
- 5.24. Emergency Stopping
- 6. Replacement Parts
- 6.1. Service Literature
- 6.1.1. Order Service Parts Online
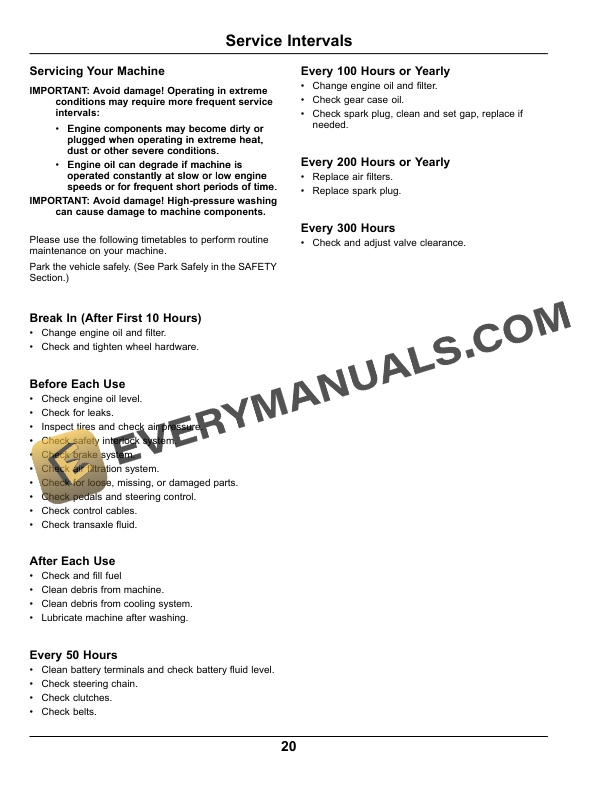
- 7. Service Intervals
- 7.1. Servicing Your Machine
- 7.2. Break In (After First 10 Hours)
- 7.3. Before Each Use
- 7.4. After Each Use
- 7.5. Every 50 Hours
- 7.6. Every 100 Hours or Yearly
- 7.7. Every 200 Hours or Yearly
- 7.8. Every 300 Hours
- 8. Service Lubrications
- 8.1. Lubricating Rear Axle
- 9. Service Engine
- 9.1. Avoid Fumes
- 9.2. Engine Oil
- 9.3. Checking Engine Oil Level
- 9.4. Changing Engine Oil and Filter
- 9.5. Cleaning Engine Fins
- 9.6. Replacing Air Cleaner Element
- 9.7. Checking Spark Plug
- 10. Service Transmission
- 10.1. Anti Chatter Transmission Oil
- 10.2. Gear Oil
- 10.3. Checking Belt Condition
- 10.4. Checking Drive Clutch Shoes
- 10.5. Checking Transaxle Oil
- 10.6. Changing Transaxle Oil
- 10.7. Lubricating Rear Axle
- 10.8. Adjusting Shift Control Rod
- 11. Service Steering Brakes
- 11.1. Removing Front Wheel
- 11.2. Adjusting Steering Chain
- 12. Service Electrical
- 12.1. Service the Battery Safely
- 12.2. Cleaning Battery and Terminals
- 12.3. Checking Battery Electrolyte Level
- 12.4. Using Booster Battery
- 12.5. Replacing Fuses
- 12.6. Replacing Headlights (Optional)
- 13. Service Miscellaneous
- 13.1. Using Proper Fuel
- 13.2. Filling Fuel Tank
- 13.3. Checking Tire Pressure
- 13.4. Using Correct Tires and Inflation
- 13.5. Checking Wheel Bolts
- 13.6. Removing and Installing Wheel
- 13.7. Removing (Optional) Spiker
- 13.8. Installing (Optional) Spiker
- 13.9. Servicing (Optional) Spiker
- 13.10. Replacing (Optional) Spikes
- 14. Storage
- 14.1. Storing Safety
- 14.2. Preparing Machine for Storage
- 14.3. Preparing Fuel and Engine For Storage
- 14.3.1. Engine
- 14.4. Removing Machine From Storage
- 14.5. Storing (Optional) Spiker
- 15. Troubleshooting
- 15.1. Using Troubleshooting Chart
- 15.2. Machine
- 15.3. Electrical
- 16. Assembly
- 16.1. Installing Steering Wheel
- 16.2. Install Tires
- 16.3. Checking Tire Pressure
- 16.4. RePosition Lift Actuator
- 16.5. Install Seat
- 16.6. Activate and Charge Battery
- 16.7. Remove Lift Bar for (Optional) Spiker
- 16.8. Identify Parts for (Optional) Spiker
- 16.8.1. Box of Parts
- 16.8.2. Bag of Parts
- 16.9. Connect Main Frame to Pivot Frame for (Optional) Spiker
- 16.10. Install Down Pressure Springs for (Optional) Spiker
- 16.11. Installing (Optional) Spiker
- 16.12. Checking Fluid Levels
- 16.13. Checking Machine Safety System
- 17. Specifications
- 17.1. Specifications
- 17.1.1. Engine Specifications
- 17.1.2. Electrical System
- 17.1.3. Steering and Brake
- 17.1.4. Travel Speeds
- 17.1.5. Fluid Capacities
- 17.1.6. Wheels and Tires
- 17.1.7. Spiker (Optional)
- 17.1.8. Slope Operation
- 17.1.9. Dimensions
- 17.1.10. Recommended Lubricants
- 17.1.11. Sound Measurements
- 17.1.12. Vibration Measurements
- 18. Declaration of Conformity
- 18.1. EC Declaration of Conformity
- 19. Service Statement
- 19.1. John Deere Parts
- 19.2. The Right Tools
- 19.3. WellTrained Technicians
- 19.4. Prompt Service
- 20. Service Record
- 20.1. Record Service Dates