Description
-
Model List:
- 7500 Lightweight Fairway Mower
- 7700 Lightweight Fairway Mower
- 8500 Lightweight Fairway Mower
- 8700 Lightweight Fairway Mower
- 8800 Lightweight Fairway Mower
- 1. Introduction
- 1.1. Thank You for Purchasing a John Deere Product
- 1.2. Using Your Operators Manual
- 1.3. Special Messages
- 2. Product Identification
- 2.1. Record Identification Numbers
- 3. Table of Contents
- 4. Safety Labels
- 4.1. Understanding The Machine Safety Labels
- 4.2. Identifying Appropriate Safety Labels
- 4.3. CAUTION TCU23845
- 4.4. DANGER M131739
- 4.5. Danger TCU20639
- 4.6. WARNING
- 4.7. ROLLOVER PROTECTIVE STRUCTURE
- 4.8. Emission Control System Certification Label
- 4.9. Certification
- 4.10. Operator Training Required
- 4.11. Preparation
- 4.12. Operating Safely
- 4.13. Using a Spark Arrestor
- 4.14. Checking Mowing Area
- 4.15. Parking Safely
- 4.16. Rotating Blades are Dangerous
- 4.17. Avoid Injury From Contacting Blades
- 4.18. Protect Children
- 4.19. Avoid Tipping
- 4.20. Use Seat Belt Properly
- 4.21. Keep ROPS Installed Properly
- 4.22. Keep Riders Off
- 4.23. Driving Safely on Public Roads
- 4.24. Checking Wheel Hardware
- 4.25. Wear Appropriate Clothing
- 4.26. Maintenance and Storage
- 4.27. Avoid High Pressure Fluids
- 4.28. Prevent Fires
- 4.29. Tire Safety
- 4.30. Handling Fuel Safely
- 4.31. Handling Waste Product and Chemicals
- 5. Operating Controls
- 5.1. Operating Controls
- 6. Operating Machine
- 6.1. Daily Operating Checklist
- 6.2. Avoid Damage to Plastic and Painted Surfaces
- 6.3. Electronic Control Module
- 6.4. Testing Safety Systems
- 6.5. Testing Neutral Safety System Starting Engine
- 6.6. Testing Neutral Safety System Engine Running
- 6.7. Using Seat Belt
- 6.8. Using Fuel Shutoff Valve
- 6.9. Using Park Brake
- 6.10. Using Indicator Lights
- 6.11. Safety Interlock System
- 6.12. Starting the Engine
- 6.13. Stopping Engine
- 6.14. Adjusting Mow and Transport Speeds
- 6.15. Using MowTransport Lever
- 6.16. Using RaiseLower Lever
- 6.17. Using Cruise Control (Optional)
- 6.18. Using Hydrostatic Transmission
- 6.19. Transporting Mower on Trailer
- 6.20. Driving Mower to Work Site
- 6.21. Moving Machine Manually
- 7. Operating Cutting Units
- 7.1. Cleaning Cutting Units
- 7.2. Engaging Cutting Units
- 7.3. Adjusting Reel Speed
- 7.4. Adjusting Bed KnifetoReel (2500M)
- 7.5. Adjusting HeightofCut Range (2500M)
- 7.6. Adjusting Front Roller Parallel with Bed Knife (2500M)
- 7.7. Adjusting HeightofCut (2500M)
- 7.8. Adjusting Cutting Unit Shield (2500M)
- 7.9. Removing and Emptying Grass Catchers (2500M)
- 7.10. Adjusting HeightofCut After Servicing (22 ESP)
- 7.11. HeightofCut Field Adjustment (22 ESP)
- 7.12. Adjusting ReeltoBed Knife Clearance (22 ESP)
- 7.13. Adjusting Grass Deflector (22 ESP)
- 7.14. Emptying the Grass Catchers (22 ESP)
- 7.15. Operating (Optional) Fairway Tender Conditioner
- 7.16. Adjusting (Optional) Fairway Tender Conditioner
- 7.17. Adjusting (Optional) Rear Roller Power Brush
- 7.18. Operating and Adjusting (Optional) 2500M Vertical Cutters
- 7.19. Operating and Adjusting Optional Vertical Cutters (22 ESP)
- 7.20. Adjusting Rotary Cutting Units (IRS)
- 7.21. Adjusting Cutting Unit Down Pressure (Optional For 7000 and 8000 series)
- 8. Replacement Parts
- 8.1. Service Literature
- 8.2. Part Numbers
- 9. Service Intervals
- 9.1. Servicing Your Machine
- 9.2. BreakIn After First 5 Hours of Operation
- 9.3. BreakIn After First 50 Hours of Operation
- 9.4. Before Each Use
- 9.5. After Each Use
- 9.6. Every 50 Hours
- 9.7. Every 200 Hours
- 9.8. Every 500 Hours
- 9.9. Every 1500 Hours or Two Years
- 9.10. Every 2000 Hours or Two Years
- 9.11. Every 3000 Hours or Three Years
- 9.12. As Needed
- 10. Service Lubrication
- 10.1. Grease Locations Cutting Units and Lift Arms
- 10.2. Grease Locations Machine
- 10.3. Greasing Rear Lift Linkage
- 11. Service Engine
- 11.1. Engine Warranty Maintenance Statement
- 11.2. Engine Oil Diesel
- 11.3. Avoid Fumes
- 11.4. Raising Hood
- 11.5. Raising and Lowering Seat
- 11.6. Checking Engine Oil Level
- 11.7. Changing Engine Oil and Filter
- 11.8. Checking Air Restriction Indicator
- 11.9. Changing Air Cleaner Elements
- 11.10. Changing Secondary Element
- 11.11. Cleaning Under Hood And Seat
- 11.12. Cleaning Radiator
- 11.13. Service Cooling System Safely
- 11.14. Recommended Engine Coolant
- 11.15. Servicing Cooling System
- 11.16. Checking Radiator Hoses and Clamps
- 11.17. Changing Fuel Filter
- 11.18. Priming Diesel Fuel System
- 11.19. Checking Water Separator Bowl
- 11.20. Fuel Injection Pump
- 11.21. Servicing Alternator Belt
- 11.22. Adjusting or Replacing Fan Belt
- 12. Service Transmission
- 12.1. Transmission and Hydraulic Oil
- 12.2. Converting From HYGARD to BIO HYGARD
- 12.3. Biodegradable Oil
- 12.4. Hydraulic Component Location
- 12.5. Service Safely
- 12.6. Checking and Adding Transmission Hydraulic Oil
- 12.7. Changing Transmission Oil And Filter
- 13. Service Cutting Units
- 13.1. Avoid Injury from Contacting Blades
- 13.2. Rotating Reel Cutting Units
- 13.3. Adjusting Rear Stabilizer
- 13.4. Adjusting Cutting Units (22 ESP)
- 13.5. Removing Cutting Units (22 ESP)
- 13.6. Backlapping Cutting Units
- 13.7. Removing and Installing Front Roller (2500M)
- 13.8. Removing and Installing Rear Roller (2500M)
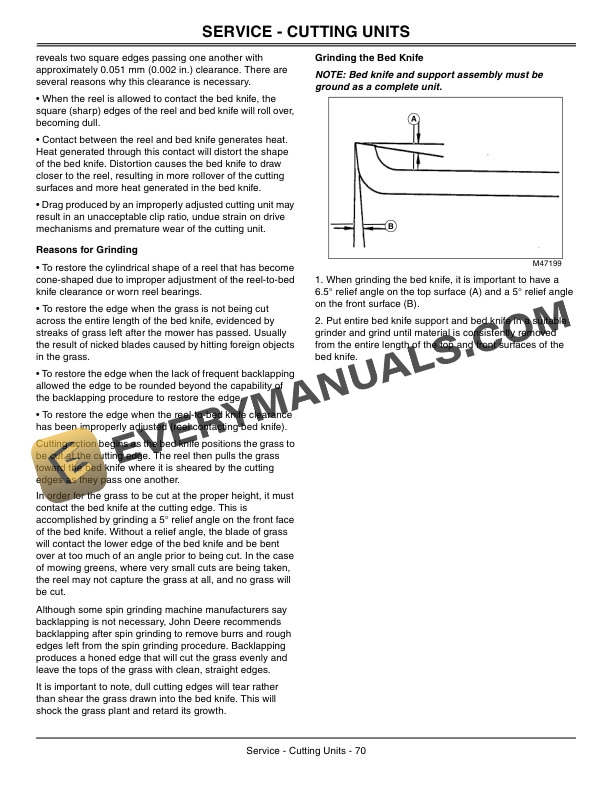
- 13.9. Grinding Reel and Bed Knife
- 13.10. Replacing Bed Knife (2500M)
- 13.11. Removing and Installing Bed Knife (22 ESP)
- 13.12. Cleaning Roller Scraper (22 ESP)
- 13.13. Installing Reel Adjustment Washers (22 ESP)
- 13.14. Removing and Installing Blades (Rotary)
- 13.15. Removing and Installing Cutting Units (Rotary)
- 13.16. Sharpening Blades
- 13.17. Balancing Blades
- 14. Service Electrical
- 14.1. Service the Battery Safely
- 14.2. Cleaning Battery and Terminals
- 14.3. Checking Battery Electrolyte Level
- 14.4. Using Booster Battery
- 14.5. Replacing Fuses
- 15. Service Miscellaneous
- 15.1. Using Proper Fuel (Diesel)
- 15.2. Filling Fuel Tank
- 15.3. Checking Tire Pressure
- 15.4. Check Wheel Bolt Torque
- 15.5. Adjusting Park Brake
- 15.6. Checking and Adjusting ToeIn
- 15.7. Cleaning Plastic Surfaces
- 15.8. Cleaning and Repairing Metal Surfaces
- 16. Troubleshooting
- 16.1. Using Troubleshooting Chart
- 16.2. Electrical System
- 16.3. Brakes And Steering
- 16.4. Cutting Units
- 17. Storage
- 17.1. Storing Safety
- 17.2. Preparing Machine for Storage
- 17.3. Preparing Fuel and Engine for Storage
- 17.4. Removing Machine From Storage
- 18. Specifications
- 18.1. Fuel System
- 18.2. Electrical System
- 18.3. Capacities
- 18.4. Drive Train
- 18.5. Travel Speeds
- 18.6. Steering and Brakes
- 18.7. Dimensions
- 18.8. Wheel Bolt Torques
- 18.9. Recommended Lubricants
- 19. Warranty
- 19.1. Product Warranty
- 19.2. John Deere, Federal And California Emission Control System Warranty (NonRoad Diesel)
- 19.3. Tire Warranty
- 19.4. Limited Battery Warranty
- 20. John Deere Quality Statement
- 20.1. John Deere Quality
- 21. Service Record
- 21.1. Record Service Dates