
Description
-
Model List:
- H480 Loader
- 1. Introduction
- 1.1. Foreword
- 2. General Information
- 2.1. Machine Overview
- 2.2. Product View
- 2.3. Trademarks
- 2.4. Abbreviations
- 2.5. Dealers Record
- 2.6. Predelivery
- 2.7. Delivery
- 2.8. AfterSale
- 2.9. Recognize Safety Information
- 2.10. Understand Signal Words
- 2.11. Follow Safety Instructions
- 2.12. Prepare for Emergencies
- 2.13. Wear Protective Clothing
- 2.14. Park Machine Safely
- 2.15. Protect People and Animals
- 2.16. Operating the Loader Tractor Safely
- 2.17. Use Seat Belt Properly
- 2.18. Use Foldable ROPS and Seat Belt Properly
- 2.19. Use Caution on Slopes, Uneven Terrain, and Rough Ground
- 2.20. Avoid Injury or Death from Falling Loads
- 2.21. Carry Materials Safely
- 2.22. Transporting Round Bales Safely
- 2.23. Operate Grapple (If Equipped)
- 2.23.1. Avoid Injury or Death from Falling Round Bales
- 2.23.2. How to Pick Up a Round Bale
- 2.23.3. How to Pick Up a Round Bale on a Slope
- 2.23.4. How to Transport a Round Bale
- 2.23.5. How to Remove Material from a Pile
- 2.24. Driving on Public Roads
- 2.25. Operating Loader with Attachments from Other Manufacturers
- 2.26. Operate Bucket/Attachment Safely
- 2.27. Operating NonSelfLevelling Loaders
- 2.28. Avoid Power Lines
- 2.29. Dig Safely
- 2.30. Detach Loader Safely
- 2.31. Use Safety Lights and Devices
- 2.32. Practice Safe Maintenance
- 2.33. Service Loader Safely
- 2.34. Service Machines Safely
- 2.35. Service Accumulator Systems Safely
- 2.36. Avoid Heating Near Pressurized Fluid Lines
- 2.37. Check Hoses for Damage
- 2.38. Avoid HighPressure Fluids
- 2.39. Remove Paint Before Welding or Heating
- 2.40. Decommissioning Proper Recycling and Disposal of Fluids and Components
- 3. Safety Signs
- 3.1. Replace Safety Signs
- 3.2. Avoid HighPressure Spray on Safety Decals
- 3.3. Ballast Box
- 3.4. Accumulator
- 4. Application Charts
- 4.1. Approved Tractors
- 4.2. Approved Front Tires, Load Index, Maximum Turn Angle, and Tread Setting
- 5. Prepare Tractor
- 5.1. Prepare the Tractor
- 5.2. Rear Ballast
- 5.3. Minimum Rear Ballast Requirements and Tire Ratings
- 5.4. Remove Front Weights and Weight Support
- 5.5. Front Tread Setting
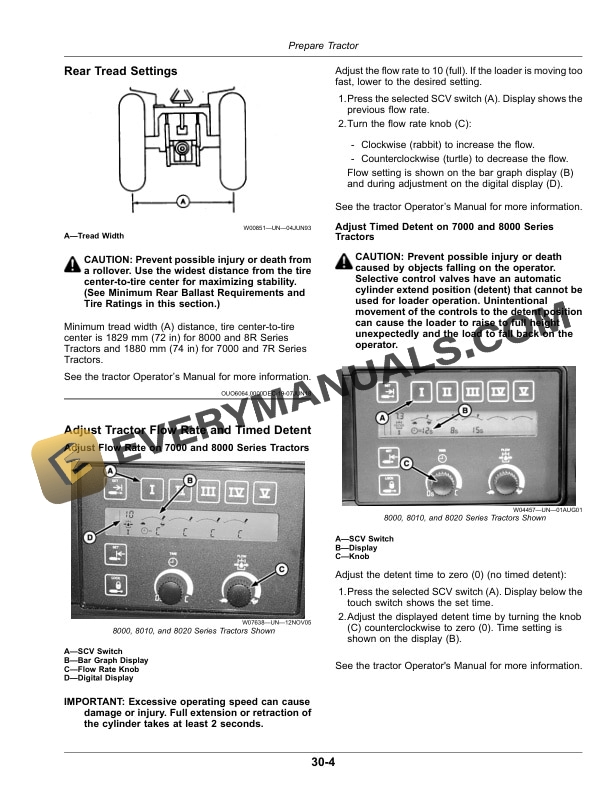
- 5.6. Rear Tread Settings
- 5.7. Adjust Tractor Flow Rate and Timed Detent
- 5.7.1. Adjust Flow Rate on 7000 and 8000 Series Tractors
- 5.7.2. Adjust Timed Detent on 7000 and 8000 Series Tractors
- 5.7.3. Adjust Flow Rate and Timed Detent on 7R MY1113 and 8R MY1013 Series Tractors
- 5.7.4. Adjust Flow Rate and Timed Detent on 7R MY14 and 8R MY14 Series Tractors
- 6. Controls
- 6.1. Operate Loader with MultiFunction Lever (All Except 7020, 7030, 8030, 7R, and 8R Series Tractors)
- 6.2. Enable MultiFunction Lever (7020, 7030, and 8030 Series Tractors)
- 6.3. Disable MultiFunction Lever (7020, 7030, and 8030 Series Tractors)
- 6.4. Operate Loader with MultiFunction Lever (7020, 7030, and 8030 Series Tractors)
- 6.5. Enable or Disable MultiFunction Lever (7R MY1113 and 8R MY1013 Series Tractors)
- 6.6. Operate Loader with MultiFunction Lever (7R MY1113 and 8R MY1013 Series Tractors)
- 6.7. Operate Loader with MultiFunction Lever (7R MY14 and 8R MY14 Series Tractors)
- 6.7.1. MultiFunction Lever Controls Custom Setup
- 6.8. Navigate to Controls Setup (7R MY14 and 8R MY14 Series Tractors)
- 6.9. Controls Setup (7R MY14 and 8R MY14 Series Tractors)
- 6.10. Controls (7R MY14 and 8R MY14 Series Tractors)
- 6.11. Lock Out Control Levers
- 6.12. Operate Loader with a Selective Control Valve (SCV) with a Finger Pad Control (8000, 8010, 8020, 8030 and 8R Series Tractors)
- 6.13. Operate Attachment (If Equipped)
- 6.14. Relieve Hydraulic Pressure
- 7. Attach and Detach Loader
- 7.1. Attach Loader
- 7.2. Detach Loader
- 8. Attach and Detach Bucket or Attachment
- 8.1. Attachments Available
- 8.2. Attach Bucket or Attachment
- 8.3. Detach Bucket or Attachment
- 9. Transport
- 9.1. Keep Riders Off Machine
- 9.2. Driving on Public Roads
- 9.3. Carry Loads
- 10. Operate Loader
- 10.1. Raise and Lower Loader
- 10.2. Remove Material from a Pile
- 10.3. Level Bucket
- 10.4. Level and Scrape Forward
- 10.5. Level in Reverse
- 10.6. Dump Bucket
- 10.7. Operate Grapple (If Equipped)
- 10.7.1. Avoid Injury or Death from Falling Round Bales
- 10.7.2. How to Pick Up a Round Bale
- 10.7.3. How to Pick Up a Round Bale on a Slope
- 10.7.4. How to Transport a Round Bale
- 10.7.5. How to Remove Material from a Pile
- 10.8. Park Tractor with Loader Attached
- 11. Lubrication and Maintenance
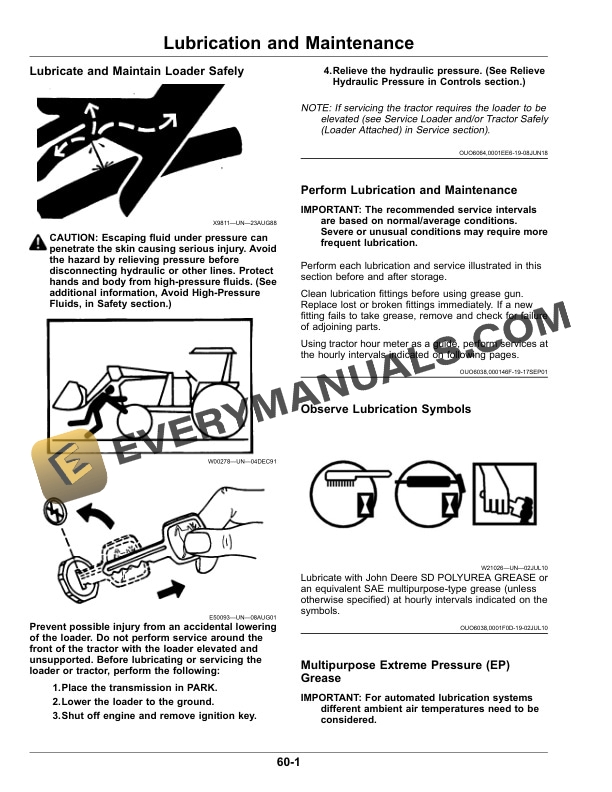
- 11.1. Lubricate and Maintain Loader Safely
- 11.2. Perform Lubrication and Maintenance
- 11.3. Observe Lubrication Symbols
- 11.4. Multipurpose Extreme Pressure (EP) Grease
- 11.5. Alternative and Synthetic Lubricants
- 11.6. First 3 and 10 Hours
- 11.6.1. First 3 Hours
- 11.6.2. First 10 Hours
- 11.7. Every 10 Hours
- 11.7.1. Latch Pins
- 11.7.2. Grapple
- 11.8. Every 50 Hours
- 11.8.1. Electrical Latching System (If Equipped)
- 11.8.2. Tighten Mounting Frame Hardware
- 11.8.3. Tighten MFWD Axle Housing and Kingpin Mounting Hardware
- 11.9. Every 100 Hours or MonthlyCheck Hydraulic Hoses
- 11.10. Every Six YearsReplace Hydraulic Hoses
- 12. Troubleshoot
- 12.1. Hydraulic
- 12.2. Mast Pin
- 12.3. Electrical Latching System
- 13. Service
- 13.1. Service Loader and/or Tractor Safely (Loader Attached)
- 13.2. Work in Clean Area
- 13.3. Avoid HighPressure Fluids
- 13.4. ORing Installation
- 13.5. Tighten Hydraulic Fittings and Hoses
- 13.6. Replace Hydraulic Hoses, Couplers, Tubing, and Connectors
- 13.7. PlugIn Type Hydraulic Fittings
- 13.8. Access Front of Tractor8020, 8030, 7R, and 8R Series Tractors
- 13.9. Access Front of Tractor8000, 8010, 7020, and 7030 Series Tractors
- 13.10. Identify Hose ConnectionsLoadertoMulticoupler
- 13.11. Identify Hose Connections7020, 7030, and 7R Series Tractors
- 13.12. Identify Hose Connections for Finger Pad Control (SCV) Operated Loader8000, 8010, 8020, 8030, and 8R Series Tractors
- 13.13. Identify Hose Connections for MultiFunction Lever Operated Loader8030 and 8R Series Tractors
- 13.14. Identify Hose Connections for MultiFunction Lever Operated Loader8000, 8010, and 8020 Series Tractors
- 13.15. Identify Loader Oil Line Connections
- 13.16. Metric Bolt and Screw Torque Values
- 13.17. Unified Inch Bolt and Screw Torque Values
- 14. Storage
- 14.1. Prepare Loader for Storage
- 14.2. Store Loader and Attachments
- 15. Specifications
- 15.1. Specification Parameters
- 15.2. Loader Specifications on 8225R, 8235R, 8245R, 8260R, 8270R, 8285R, 8295R, 8310R, 8320R, 8335R, 8345R, 8360R, 8370R, and 8400R Series with 1300 MFWD Front Axle Tractors
- 15.3. Loader Specifications on 8225R, 8235R, 8245R, 8260R, 8270R, 8285R, 8295R, 8310R, 8320R, 8335R, 8345R, 8360R, 8370R, and 8400R Series with ILS or 1500 MFWD Front Axle Tractors
- 15.4. Loader Specifications on 7630, 7730, 7830, and 7930 MFWD Tractors
- 15.5. Loader Specifications on 7200R, 7210R, 7215R, 7230R, 7250R, 7260R, 7270R, 7280R, 7290R, and 7310R MFWD Tractors
- 15.6. Round Bale Handling Capacities
- 15.6.1. Round Bale Capacities
- 15.6.2. Round Bale Sizes and Weights
- 16. Serial Number
- 16.1. Record Product Identification Number
- 16.2. Keep Proof of Ownership
- 16.3. Keep Machines Secure
- 17. John Deere Service Keeps You On The Job
- 17.1. John Deere Is At Your Service




