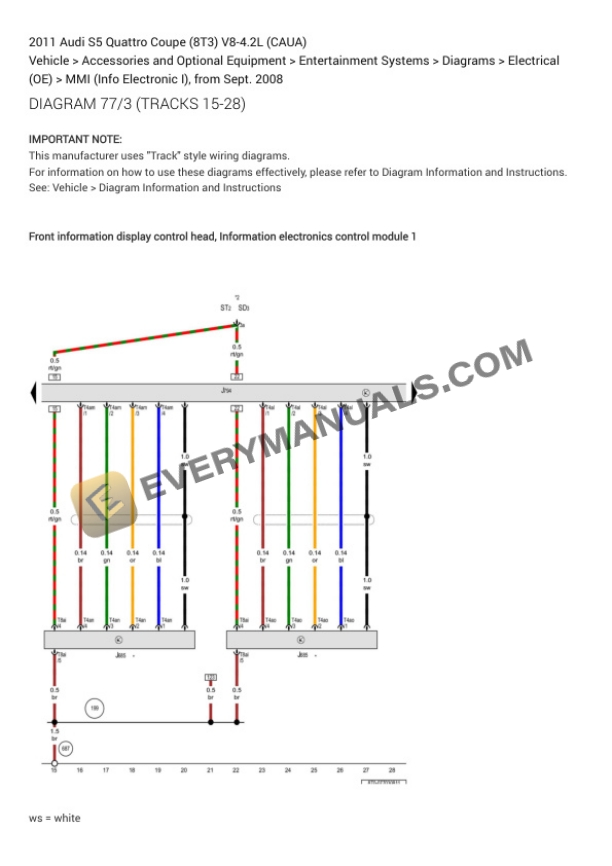
Description
-
Model List:
- S5 Quattro Coupe (8T3)
- 1. Air Conditioning – Automatic A_C Circuit (Basic)
- 2. Air Conditioning – Automatic A_C Circuit (Comfort)
- 3. Anti-Lock Brakes
- 4. Anti-Theft
- 5. Body Computer – Comfort System Central Control Module Circuit
- 6. Computer Data Lines
- 7. Convertible Top Circuit
- 8. Cooling Fans
- 9. Cruise Control
- 10. Defogger
- 11. Door Locks
- 12. Electronic Power Steering – Active Steering Control Module Circuit
- 13. Electronic Power Steering – Electronic Power Steering Circuit
- 14. Electronic Suspension
- 15. Engine Controls
- 16. Exterior Lights – Backup Lamps Circuit
- 17. Exterior Lights – Exterior Lamps Circuit
- 18. Exterior Lights – Trailer Tow Circuit
- 19. Ground Distribution
- 20. Headlights – W_ Bi-Xenon W_ Cornering Headlights
- 21. Headlights – W_ Bi-Xenon W_O Cornering Headlights
- 22. Headlights – W_O Bi-Xenon Headlights
- 23. Instrument Cluster – Front Information Display Control Module Circuit (Convertible)
- 24. Instrument Cluster – Front Information Display Control Module Circuit (Coupe Basic)
- 25. Instrument Cluster – Front Information Display Control Module Circuit (Coupe High)
- 26. Instrument Cluster – Instrument Cluster Circuit
- 27. Interior Lights – Courtesy Lamps Circuit
- 28. Interior Lights – Instrument Illumination Circuit
- 29. Memory Systems – Drivers Memory Seat Circuit
- 30. Memory Systems – Memory Mirrors Circuit
- 31. Memory Systems – Passengers Memory Seat Circuit
- 32. Mirrors – Automatic Day_Night Mirror Circuit (W_ Humidity Sensor)
- 33. Mirrors – Automatic Day_Night Mirror Circuit (W_O Humidity Sensor)
- 34. Mirrors – Power Mirrors Circuit
- 35. Navigation – Lane Departure Warning Circuit
- 36. Navigation – Navigation Circuit (Basic Infotainment)
- 37. Navigation – Navigation Circuit (Convertible Premium Infotainment)
- 38. Navigation – Navigation Circuit (Convertible Premium MMI)
- 39. Navigation – Navigation Circuit (Convertible Standard MMI amp Basic MMI)
- 40. Navigation – Navigation Circuit (Coupe Basic MMI)
- 41. Navigation – Navigation Circuit (Coupe Premium Infotainment)
- 42. Navigation – Navigation Circuit (Coupe Premium MMI)
- 43. Navigation – Navigation Circuit (Coupe Standard MMI)
- 44. Navigation – Navigation Circuit (Standard Infotainment)
- 45. Navigation – Parking Assistant Circuit
- 46. Navigation – Rear Camera Circuit
- 47. Navigation – Vehicle Positioning Interface Control Module Circuit
- 48. Park Brake Release Circuit
- 49. Power Distribution
- 50. Power Tops – Sunroof Circuit
- 51. Power Windows
- 52. Seats – Front Heated Seats Circuit (Convertible W_O Memory)
- 53. Seats – Front Heated Seats Circuit (Coupe W_O Memory)
- 54. Seats – Front Heated Seats Circuit (W_ Memory)
- 55. Seats – Lumbar Circuit
- 56. Seats – Rear Heated Seats Circuit
- 57. Shift Interlock – Shift Interlock Circuit
- 58. Sound Systems – MOST Data Bus Circuit (Convertible)
- 59. Sound Systems – MOST Data Bus Circuit (Coupe)
- 60. Sound Systems – Radio Circuit (Basic Infotainment)
- 61. Sound Systems – Radio Circuit (Convertible Premium Infotainment)
- 62. Sound Systems – Radio Circuit (Convertible Premium MMI)
- 63. Sound Systems – Radio Circuit (Convertible Standard MMI amp Basic MMI)
- 64. Sound Systems – Radio Circuit (Coupe Basic MMI)
- 65. Sound Systems – Radio Circuit (Coupe Premium Infotainment)
- 66. Sound Systems – Radio Circuit (Coupe Premium MMI)
- 67. Sound Systems – Radio Circuit (Coupe Standard MMI)
- 68. Sound Systems – Radio Circuit (Standard Infotainment)
- 69. Starting_Charging – Charging Circuit (Convertible)
- 70. Starting_Charging – Charging Circuit (Coupe)
- 71. Starting_Charging – Starting Circuit
- 72. Steering Column Circuit
- 73. Steering Column Electronic Systems Control Module Circuit
- 74. Supplemental Restraints
- 75. Transmissions – A_T Circuit (6 Speed A_T)
- 76. Transmissions – A_T Circuit (W_ Direct Shift)
- 77. Transmissions – AWD Circuit
- 78. Trunk, Tailgate, Fuel Doors – Trunk amp Fuel Door Release Circuit
- 79. Vehicle Electrical System Control Module Circuit
- 80. Warning Systems – Brake Wear Sensor Circuit
- 81. Warning Systems – Tire Pressure Monitoring Circuit
- 82. Wiper_Washer – Jet Heater Circuit
- 83. Wiper_Washer – Wiper_Washer Circuit
- 84. Diagram 100_1
- 85. Diagram 100_2 (Tracks 1-14)
- 86. Diagram 100_3 (Tracks 15-28)
- 87. Diagram 100_4 (Tracks 29-42)
- 88. Diagram 100_5 (Tracks 43-56)
- 89. Diagram 102_1
- 90. Diagram 102_2 (Tracks 1-14)
- 91. Diagram 102_3 (Tracks 15-28)
- 92. Diagram 104_1
- 93. Diagram 104_2 (Tracks 1-14)
- 94. Diagram 105_1
- 95. Diagram 105_2 (Tracks 1-14)
- 96. Diagram 105_3 (Tracks 15-28)
- 97. Diagram 105_4 (Tracks 29-42)
- 98. Diagram 106_1
- 99. Diagram 106_2 (Tracks 1-14)
- 100. Diagram 106_3 (Tracks 15-28)
- 101. Diagram 106_4 (Tracks 29-42)
- 102. Diagram 106_5 (Tracks 43-56)
- 103. Diagram 114_1
- 104. Diagram 114_10 (Tracks 113-126)
- 105. Diagram 114_11 (Tracks 127-140)
- 106. Diagram 114_12 (Tracks 141-154)
- 107. Diagram 114_13 (Tracks 155-168)
- 108. Diagram 114_14 (Tracks 169-182)
- 109. Diagram 114_15 (Tracks 183-196)
- 110. Diagram 114_16 (Tracks 197-210)
- 111. Diagram 114_17 (Tracks 211-224)
- 112. Diagram 114_18 (Tracks 225-238)
- 113. Diagram 114_19 (Tracks 239-252)
- 114. Diagram 114_2 (Tracks 1-14)
- 115. Diagram 114_20 (Tracks 253-266)
- 116. Diagram 114_21 (Tracks 267-280)
- 117. Diagram 114_22 (Tracks 281-294)
- 118. Diagram 114_23 (Tracks 295-308)
- 119. Diagram 114_24 (Tracks 309-322)
- 120. Diagram 114_25 (Tracks 323-336)
- 121. Diagram 114_26 (Tracks 337-350)
- 122. Diagram 114_27 (Tracks 351-364)
- 123. Diagram 114_28 (Tracks 365-378)
- 124. Diagram 114_29 (Tracks 379-392)
- 125. Diagram 114_3 (Tracks 15-28)
- 126. Diagram 114_30 (Tracks 393-406)
- 127. Diagram 114_4 (Tracks 29-42)
- 128. Diagram 114_5 (Tracks 43-56)
- 129. Diagram 114_6 (Tracks 57-70)
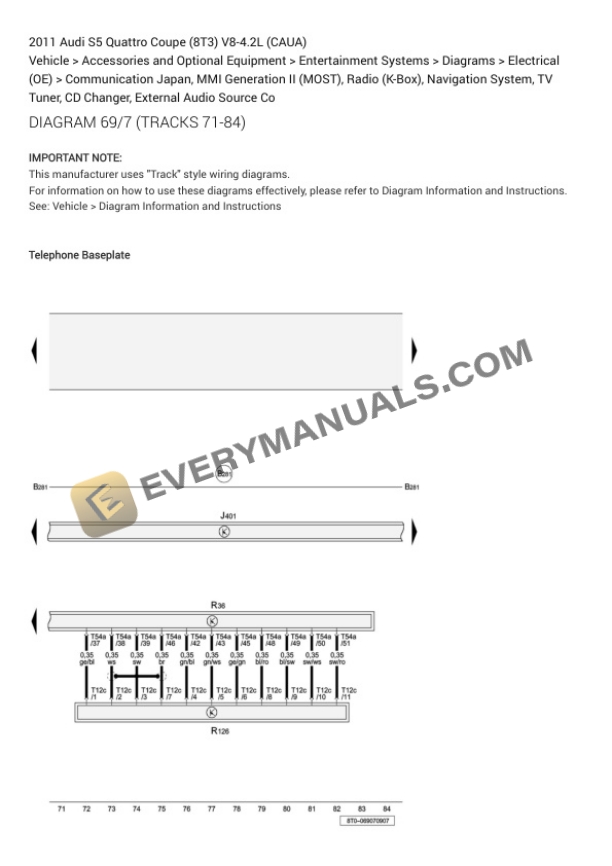
- 130. Diagram 114_7 (Tracks 71-84)
- 131. Diagram 114_8 (Tracks 85-98)
- 132. Diagram 114_9 (Tracks 99-112)
- 133. Diagram 116_1
- 134. Diagram 116_2 (Tracks 1-14)
- 135. Diagram 116_3 (Tracks 15-28)
- 136. Diagram 116_4 (Tracks 29-42)
- 137. Diagram 117_1
- 138. Diagram 117_2 (Tracks 1-14)
- 139. Diagram 117_3 (Tracks 15-28)
- 140. Diagram 117_4 (Tracks 29-42)
- 141. Diagram 117_5 (Tracks 43-56)
- 142. Diagram 117_6 (Tracks 57-70)
- 143. Diagram 118_1
- 144. Diagram 118_2 (Tracks 1-14)
- 145. Diagram 118_3 (Tracks 15-28)
- 146. Diagram 118_4 (Tracks 29-42)
- 147. Diagram 118_5 (Tracks 43-56)
- 148. Diagram 118_6 (Tracks 57-70)
- 149. Diagram 119_1
- 150. Diagram 119_2 (Tracks 1-14)
- 151. Diagram 119_3 (Tracks 15-28)
- 152. Diagram 119_4 (Tracks 29-42)
- 153. Diagram 11_1
- 154. Diagram 11_2 (Tracks 1-14)
- 155. Diagram 11_3 (Tracks 15-28)
- 156. Diagram 11_4 (Tracks 29-42)
- 157. Diagram 120_1
- 158. Diagram 120_2 (Tracks 1-14)
- 159. Diagram 120_3 (Tracks 15-28)
- 160. Diagram 121_1
- 161. Diagram 121_2 (Tracks 1-14)
- 162. Diagram 121_3 (Tracks 15-28)
- 163. Diagram 121_4 (Tracks 29-42)
- 164. Diagram 122_1
- 165. Diagram 122_2 (Tracks 1-14)
- 166. Diagram 123_1
- 167. Diagram 123_10 (Tracks 113-126)
- 168. Diagram 123_11 (Tracks 127-140)
- 169. Diagram 123_12 (Tracks 141-154)
- 170. Diagram 123_2 (Tracks 1-14)
- 171. Diagram 123_3 (Tracks 15-28)
- 172. Diagram 123_4 (Tracks 29-42)
- 173. Diagram 123_5 (Tracks 43-56)
- 174. Diagram 123_6 (Tracks 57-70)
- 175. Diagram 123_7 (Tracks 71-84)
- 176. Diagram 123_8 (Tracks 85-98)
- 177. Diagram 123_9 (Tracks 99-112)
- 178. Diagram 124_1
- 179. Diagram 124_2 (Tracks 1-14)
- 180. Diagram 124_3 (Tracks 15-28)
- 181. Diagram 124_4 (Tracks 29-42)
- 182. Diagram 124_5 (Tracks 43-56)
- 183. Diagram 124_6 (Tracks 57-70)
- 184. Diagram 124_7 (Tracks 71-84)
- 185. Diagram 125_1
- 186. Diagram 125_10 (Tracks 113-126)
- 187. Diagram 125_2 (Tracks 1-14)
- 188. Diagram 125_3 (Tracks 15-28)
- 189. Diagram 125_4 (Tracks 29-42)
- 190. Diagram 125_5 (Tracks 43-56)
- 191. Diagram 125_6 (Tracks 57-70)
- 192. Diagram 125_7 (Tracks 71-84)
- 193. Diagram 125_8 (Tracks 85-98)
- 194. Diagram 125_9 (Tracks 99-112)
- 195. Diagram 126_1
- 196. Diagram 126_2 (Tracks 1-14)
- 197. Diagram 126_3 (Tracks 15-28)
- 198. Diagram 126_4 (Tracks 29-42)
- 199. Diagram 126_5 (Tracks 43-56)
- 200. Diagram 126_6 (Tracks 57-70)
- 201. Diagram 126_7 (Tracks 71-84)
- 202. Diagram 127_1
- 203. Diagram 127_2 (Tracks 1-14)
- 204. Diagram 127_3 (Tracks 15-28)
- 205. Diagram 127_4 (Tracks 29-42)
- 206. Diagram 129_1
- 207. Diagram 129_2 (Tracks 1-14)
- 208. Diagram 129_3 (Tracks 15-28)
- 209. Diagram 129_4 (Tracks 29-42)
- 210. Diagram 130_1
- 211. Diagram 130_2 (Tracks 1-14)
- 212. Diagram 131_1
- 213. Diagram 131_2 (Tracks 1-14)
- 214. Diagram 131_3 (Tracks 15-28)
- 215. Diagram 131_4 (Tracks 29-42)
- 216. Diagram 132_1
- 217. Diagram 132_2 (Tracks 1-14)
- 218. Diagram 132_3 (Tracks 15-28)
- 219. Diagram 132_4 (Tracks 29-42)
- 220. Diagram 132_5 (Tracks 43-56)
- 221. Diagram 132_6 (Tracks 57-70)
- 222. Diagram 132_7 (Tracks 71-84)
- 223. Diagram 132_8 (Tracks 85-98)
- 224. Diagram 137_1
- 225. Diagram 137_2 (Tracks 1-14)
- 226. Diagram 137_3 (Tracks 15-28)
- 227. Diagram 138_1
- 228. Diagram 138_2 (Tracks 1-14)
- 229. Diagram 138_3 (Tracks 15-28)
- 230. Diagram 138_4 (Tracks 29-42)
- 231. Diagram 138_5 (Tracks 43-56)
- 232. Diagram 138_6 (Tracks 57-70)
- 233. Diagram 138_7 (Tracks 71-84)
- 234. Diagram 139_1
- 235. Diagram 139_2 (Tracks 1-14)
- 236. Diagram 139_3 (Tracks 15-28)
- 237. Diagram 139_4 (Tracks 29-42)
- 238. Diagram 139_5 (Tracks 43-56)
- 239. Diagram 13_1
- 240. Diagram 13_2 (Tracks 1-14)
- 241. Diagram 13_3 (Tracks 15-28)
- 242. Diagram 13_4 (Tracks 29-42)
- 243. Diagram 13_5 (Tracks 43-56)
- 244. Diagram 13_6 (Tracks 57-70)
- 245. Diagram 140_1
- 246. Diagram 140_2 (Tracks 1-14)
- 247. Diagram 140_3 (Tracks 15-28)
- 248. Diagram 140_4 (Tracks 29-42)
- 249. Diagram 140_5 (Tracks 43-56)
- 250. Diagram 142_1
- 251. Diagram 142_2 (Tracks 1-14)
- 252. Diagram 142_3 (Tracks 15-28)
- 253. Diagram 142_4 (Tracks 29-42)
- 254. Diagram 142_5 (Tracks 43-56)
- 255. Diagram 142_6 (Tracks 57-70)
- 256. Diagram 142_7 (Tracks 71-84)
- 257. Diagram 142_8 (Tracks 85-98)
- 258. Diagram 142_9 (Tracks 99-112)
- 259. Diagram 143_1
- 260. Diagram 143_10 (Tracks 113-126)
- 261. Diagram 143_2 (Tracks 1-14)
- 262. Diagram 143_3 (Tracks 15-28)
- 263. Diagram 143_4 (Tracks 29-42)
- 264. Diagram 143_5 (Tracks 43-56)
- 265. Diagram 143_6 (Tracks 57-70)
- 266. Diagram 143_7 (Tracks 71-84)
- 267. Diagram 143_8 (Tracks 85-98)
- 268. Diagram 143_9 (Tracks 99-112)
- 269. Diagram 144_1
- 270. Diagram 144_10 (Tracks 113-126)
- 271. Diagram 144_11 (Tracks 127-140)
- 272. Diagram 144_12 (Tracks 141-154)
- 273. Diagram 144_2 (Tracks 1-14)
- 274. Diagram 144_3 (Tracks 15-28)
- 275. Diagram 144_4 (Tracks 29-42)
- 276. Diagram 144_5 (Tracks 43-56)
- 277. Diagram 144_6 (Tracks 57-70)
- 278. Diagram 144_7 (Tracks 71-84)
- 279. Diagram 144_8 (Tracks 85-98)
- 280. Diagram 144_9 (Tracks 99-112)
- 281. Diagram 145_1
- 282. Diagram 145_2 (Tracks 1-14)
- 283. Diagram 146_1
- 284. Diagram 146_2 (Tracks 1-14)
- 285. Diagram 146_3 (Tracks 15-28)
- 286. Diagram 146_4 (Tracks 29-42)
- 287. Diagram 146_5 (Tracks 43-56)
- 288. Diagram 146_6 (Tracks 57-70)
- 289. Diagram 148_1
- 290. Diagram 148_2 (Tracks 1-14)
- 291. Diagram 148_3 (Tracks 15-28)
- 292. Diagram 148_4 (Tracks 29-42)
- 293. Diagram 148_5 (Tracks 43-56)
- 294. Diagram 148_6 (Tracks 57-70)
- 295. Diagram 148_7 (Tracks 71-84)
- 296. Diagram 149_1
- 297. Diagram 149_2 (Tracks 1-14)
- 298. Diagram 149_3 (Tracks 15-28)
- 299. Diagram 149_4 (Tracks 29-42)
- 300. Diagram 149_5 (Tracks 43-56)
- 301. Diagram 149_6 (Tracks 57-70)
- 302. Diagram 149_7 (Tracks 71-84)
- 303. Diagram 149_8 (Tracks 85-98)
- 304. Diagram 149_9 (Tracks 99-112)
- 305. Diagram 14_1
- 306. Diagram 14_2 (Tracks 1-14)
- 307. Diagram 156_1
- 308. Diagram 156_2 (Tracks 1-14)
- 309. Diagram 156_3 (Tracks 15-28)
- 310. Diagram 156_4 (Tracks 29-42)
- 311. Diagram 156_5 (Tracks 43-56)
- 312. Diagram 156_6 (Tracks 57-70)
- 313. Diagram 156_7 (Tracks 71-84)
- 314. Diagram 15_1
- 315. Diagram 15_2 (Tracks 1-14)
- 316. Diagram 16_1
- 317. Diagram 16_2 (Tracks 1-14)
- 318. Diagram 16_3 (Tracks 15-28)
- 319. Diagram 17_1
- 320. Diagram 17_2 (Tracks 1-14)
- 321. Diagram 17_3 (Tracks 15-28)
- 322. Diagram 18_1
- 323. Diagram 18_2 (Tracks 1-14)
- 324. Diagram 18_3 (Tracks 15-28)
- 325. Diagram 19_1
- 326. Diagram 19_2 (Tracks 1-14)
- 327. Diagram 1_1
- 328. Diagram 1_10 (Tracks 113-126)
- 329. Diagram 1_11 (Tracks 127-140)
- 330. Diagram 1_12 (Tracks 141-154)
- 331. Diagram 1_13 (Tracks 155-168)
- 332. Diagram 1_14 (Tracks 169-182)
- 333. Diagram 1_15 (Tracks 183-196)
- 334. Diagram 1_16 (Tracks 197-210)
- 335. Diagram 1_17 (Tracks 211-224)
- 336. Diagram 1_18 (Tracks 225-238)