
Description
-
Model List:
- 5 Meter 995 Rotary Platform
- 1. Contents
- 1.0.1. Recognize Safety Information
- 1.0.2. Understand Signal Words
- 1.0.3. Follow Safety Instructions
- 1.0.4. Prepare for Emergencies
- 1.0.5. Prevent Machine Runaway
- 1.0.6. Operate Platform Safely
- 1.0.7. Before Operating
- 1.0.8. Stay Clear of Platform
- 1.0.9. Stay Clear of Rotating Driveline
- 1.0.10. Avoid Injury From Thrown Objects
- 1.0.11. Ballast for Safe Ground Contact
- 1.0.12. Use Safety Lights and Devices
- 1.0.13. Avoid HighPressure Fluids
- 1.0.14. Support Machine Properly
- 1.0.15. Replace Safety Signs
- 1.0.16. Use Proper Lifting Equipment
- 1.0.17. Remove Paint Before Welding or Heating
- 1.0.18. Avoid Heating Near Pressurized Fluid Lines
- 1.0.19. Practice Safe Maintenance
- 1.0.20. Practice Safe Service Procedures
- 1.0.21. Use Proper Tools
- 1.0.22. Dispose of Waste Properly
- 1.1. Safety Signs
- 1.1.1. Safety Signs
- 1.2. Attaching and Detaching Platform
- 1.2.1. Attach Platform to Windrower
- 1.2.2. Adding Ballast to Windrower
- 1.2.3. Balancing Platform SidetoSide
- 1.2.4. Adjusting Platform Float
- 1.2.5. Detaching Platform
- 1.3. Operating Rotary Platform
- 1.3.1. Prestarting Checks
- 1.3.2. Breaking In Rotary Platform
- 1.3.3. Keep Riders Off Machine
- 1.3.4. Follow Safe Operating Procedures
- 1.3.5. Servicing or Repairing Windrower or Platform
- 1.3.6. Raising and Lowering Front Doors and Curtains
- 1.3.7. Adjusting Gauge Shoes
- 1.3.8. Settings for Various Crop Conditions
- 1.3.9. Adjusting Windrow Width and Shape
- 1.3.10. Adjusting Roll Timing
- 1.3.11. Checking Roll Pressure Link Position
- 1.3.12. Adjusting Conditioner Roll Pressure
- 1.3.13. Adjusting Conditioner Roll Spacing
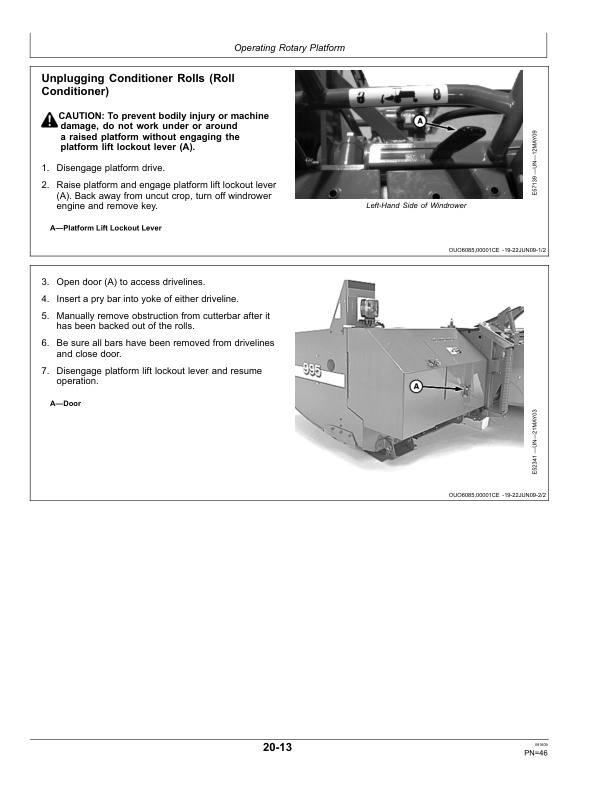
- 1.3.14. Unplugging Conditioner Rolls (Roll Conditioner)
- 1.3.15. Checking Conditioning Effect (Impeller Conditioner)
- 1.3.16. Adjusting Conditioning Intensity (Impeller Conditioner)
- 1.3.17. Changing Conditioner Speed
- 1.3.18. Adjusting Conditioner Drive Belt Tension
- 1.3.19. Shearing Disk Driver When Operating In the Field
- 1.4. Lubrication and Maintenance
- 1.4.1. Lubricating and Maintaining Machine Safely
- 1.4.2. Cutterbar Oil
- 1.4.3. Cutterbar Drive and Conditioner Drive Gear Case Oil
- 1.4.4. Converging Drum Drive Gear Case Grease
- 1.4.5. Alternative and Synthetic Lubricants
- 1.4.6. Mixing of Lubricants
- 1.4.7. Lubricant Storage
- 1.4.8. Observe Lubrication Symbols
- 1.4.9. Perform Lubrication and Maintenance
- 1.4.10. Every 10 Hours
- 1.4.11. Every 50 Hours
- 1.4.12. Every 100 Hours
- 1.4.13. Every 200 Hours
- 1.4.14. Every 800 Hours
- 1.5. Attachments
- 1.5.1. Conditioner Speed
- 1.5.2. Rotary Strippers
- 1.5.3. Adjustable Swath Board
- 1.6. Troubleshooting
- 1.6.1. Troubleshooting
- 1.7. Service
- 1.7.1. Detailed Service InformationUse TM2039
- 1.7.2. Practice Safe Service Procedures
- 1.7.3. Extinguishing a Fire
- 1.7.4. Keep Service Area Clean
- 1.7.5. Care of VBelts
- 1.7.6. Tightening Bearing Locking Collars
- 1.7.7. Platform Wiring Harness Diagram
- 1.7.8. Wiring Harness Adapter
- 1.7.9. Warn/Turn Light JumpersInformation common with Technical Manual.
- 1.7.10. Replace Shear Bolt Driveline Shear Bolt
- 1.7.11. Remove and Install Converging Drum Driveline
- 1.7.12. Remove and Install Impeller Driveline
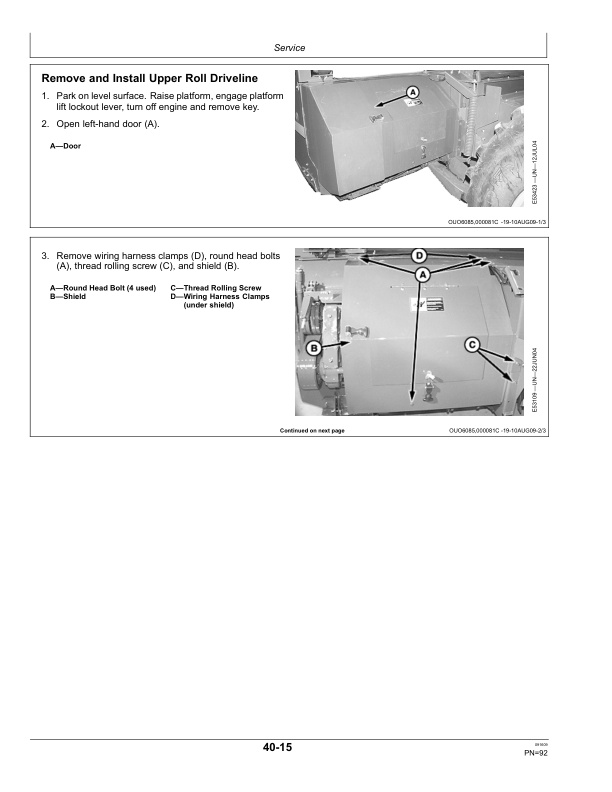
- 1.7.13. Remove and Install Upper Roll Driveline
- 1.7.14. Remove and Install Lower Roll Driveline
- 1.7.15. Replacing Rotor Tines
- 1.7.16. Check Converging Drum Wear
- 1.7.17. Remove and Install Converging Drum
- 1.7.18. Remove and Install Upper Converging Shield
- 1.7.19. Remove and Install Converging Drum Drive Belt
- 1.7.20. Replace Conditioner Drive Gear Case Belt
- 1.7.21. Check Disk Wear
- 1.7.22. Remove Disks
- 1.7.23. Install and Synchronize Disks
- 1.7.24. Remove and Install Rotary Stripper Disk (Optional)
- 1.7.25. Replace LeftHand End Disk Driver
- 1.7.26. Replace Intermediate Disk Drivers
- 1.7.27. Replace RightHand End Disk Driver
- 1.7.28. Check Knives and Knife Bolts for Wear
- 1.7.29. Remove and Install Knives
- 1.7.30. Replace Wear Cap On Knife Bolt
- 1.7.31. Replace Crop Accelerator
- 1.7.32. Remove and Install Plate and Bracket
- 1.7.33. Rotate Converging Drums By Hand
- 1.7.34. Remove and Install Gauge Shoes
- 1.8. Storage
- 1.8.1. Storing Rotary Platform (End of Season)
- 1.8.2. Removing Rotary Platform From Storage (Beginning of Season)
- 1.9. Specifications
- 1.9.1. Rotary Platform Specifications(Specifications and design sub
- 1.9.2. Metric Bolt and Screw Torque Values
- 1.9.3. Unified Inch Bolt and Screw Torque Values
- 1.9.4. Record Product Identification Numbers
- 1.9.5. Keep Proof of Ownership
- 1.9.6. Keep Machines Secure
- 1.9.7. Record Platform Serial Number
- 1.10. John Deere Service Literature Available
- 1.10.1. Technical Information
- 1.11. John Deere Service Keeps You On The Job
- 1.11.1. John Deere Is At Your Service
- 2. Page Number
- 2.1. Section 05
- 2.2. Section 10
- 2.3. Section 15
- 2.4. Section 20
- 2.5. Section 25
- 2.6. Section 30
- 2.7. Section 35
- 2.8. Section 40
- 2.9. Section 45
- 2.10. Section 50




