
Description
-
Model List:
- H180 Loader
- 1. Contents
- 1.0.1. Recognize Safety Information
- 1.0.2. Understand Signal Words
- 1.0.3. Follow Safety Instructions
- 1.0.4. Prepare for Emergencies
- 1.0.5. Wear Protective Clothing
- 1.0.6. Park Machine Safely
- 1.0.7. Protect People and Animals
- 1.0.8. Operating the Loader Tractor Safely
- 1.0.9. Use Seat Belt Properly
- 1.0.10. Use Foldable ROPS and Seat Belt Properly
- 1.0.11. Use Caution On Slopes and Uneven Terrain
- 1.0.12. Avoid Injury or Death from Falling Loads
- 1.0.13. Carry Materials Safely
- 1.0.14. Transporting Round Bales Safely
- 1.0.15. Operate Grapple (If Equipped)
- 1.0.16. Driving on Public Roads
- 1.0.17. Operating Loader with Attachments from Other Manufacturers
- 1.0.18. Operate Bucket/Attachment Safely
- 1.0.19. Operating NonSelfLevelling Loaders
- 1.0.20. Avoid Power Lines
- 1.0.21. Dig Safely
- 1.0.22. Detach Loader Safely
- 1.0.23. Use Safety Lights and Devices
- 1.0.24. Practice Safe Maintenance
- 1.0.25. Service Loader Safely
- 1.0.26. Service Machines Safely
- 1.0.27. Service Accumulator Systems Safely
- 1.0.28. Avoid Heating Near Pressurized Fluid Lines
- 1.0.29. Check Hoses for Damage
- 1.0.30. Avoid HighPressure Fluids
- 1.0.31. Remove Paint Before Welding or Heating
- 1.0.32. Dispose of Waste Properly
- 1.1. Safety Signs
- 1.1.1. Replace Safety Signs
- 1.1.2. Avoid HighPressure Spray on Safety Decals
- 1.1.3. Safety Sign Location
- 1.2. Preparing the Tractor
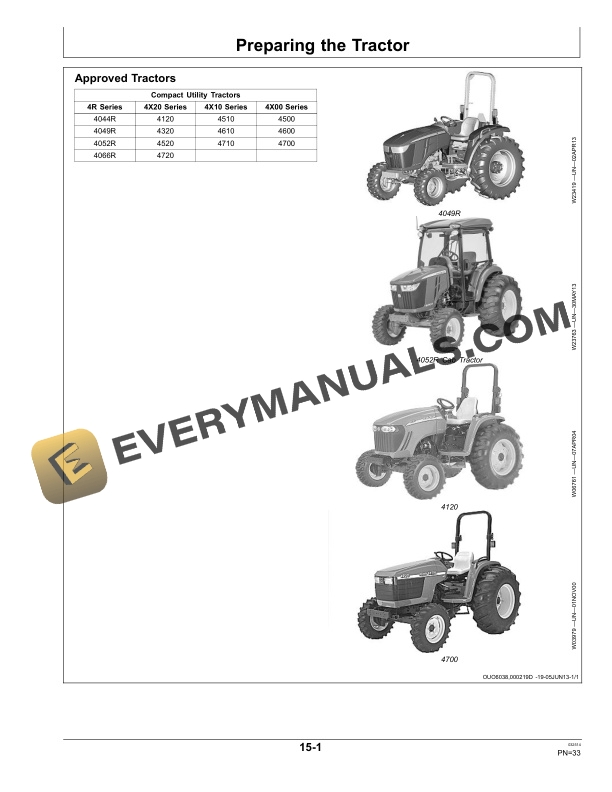
- 1.2.1. Approved Tractors
- 1.2.2. Using RollOver Protective Structure (ROPS)
- 1.2.3. Keep ROPS Installed Properly
- 1.2.4. Remove Front Weights
- 1.2.5. Approved Front Tires
- 1.2.6. Inflating Front Tires
- 1.2.7. Setting Front Tread Width
- 1.2.8. Checking Front Wheel Hardware
- 1.2.9. Approved Rear Tires
- 1.2.10. Selecting Rear Tread Width
- 1.2.11. Required Minimum Tractor Ballast
- 1.2.12. Adding Ballast to Rear Wheels
- 1.2.13. Installing Hitch Pin Bushings on Ballast Box for Category 1 Quick Coupler Hitch
- 1.2.14. Attaching Ballast Box to Tractor with ThreePoint Hitch
- 1.2.15. Attaching Ballast Box to Tractor with Quick Coupler Hitch
- 1.2.16. Adding Ballast to 3Point Hitch
- 1.3. Detaching Loader
- 1.3.1. Removing Ballast Box
- 1.3.2. Detach Loader
- 1.4. Attaching Loader
- 1.4.1. Attach Loader
- 1.5. Transporting
- 1.5.1. Keep Riders Off Machine
- 1.5.2. Driving on Public Roads
- 1.5.3. Carrying Loads
- 1.6. Operating Loader
- 1.6.1. Preoperating Checks
- 1.6.2. Using Ballast Box
- 1.6.3. Avoid Rollover Accidents
- 1.6.4. Using Bucket Level Indicator
- 1.6.5. Use of Bucket Loops (If Equipped)
- 1.6.6. Leveling and Scraping Forward
- 1.6.7. Leveling in Reverse
- 1.6.8. Carrying Material
- 1.6.9. Removing Material from a Pile
- 1.6.10. Loading Operations
- 1.6.11. Digging
- 1.6.12. Backfilling
- 1.6.13. Detaching the Bucket or Attachment
- 1.6.14. Attaching the Bucket or Attachment
- 1.6.15. Attachments Available
- 1.7. Operating Bale Spear (If Equipped)
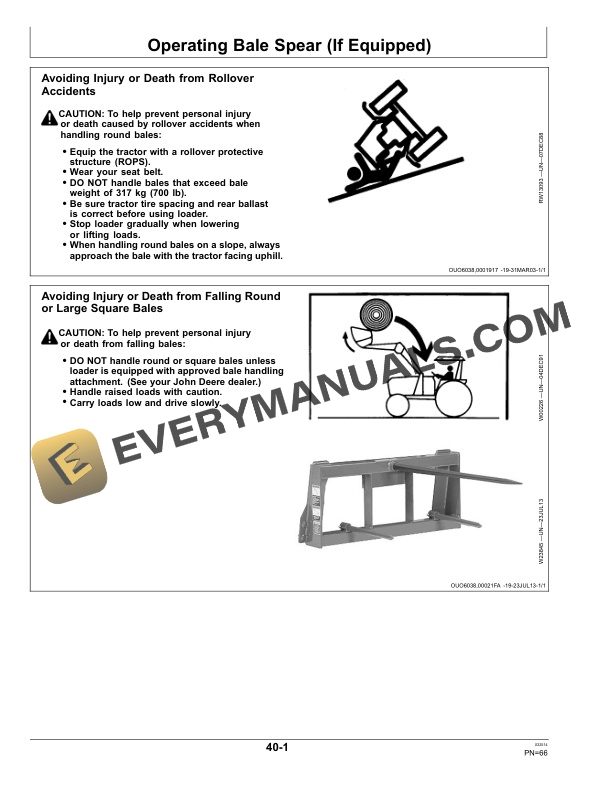
- 1.7.1. Avoiding Injury or Death from Rollover Accidents
- 1.7.2. Avoiding Injury or Death from Falling Round or Large Square Bales
- 1.7.3. Picking up a Round Bale
- 1.7.4. Picking up a Round Bale on a Slope
- 1.7.5. Transporting a Round Bale
- 1.8. Operating Hay Grapple (If Equipped)
- 1.8.1. Operate Hay Grapple
- 1.9. Operating Forklift (If Equipped)
- 1.9.1. Operate Forklift
- 1.10. Lubrication and Maintenance
- 1.10.1. Lubricating and Maintaining Loader Safely
- 1.10.2. Perform Lubrication and Maintenance
- 1.10.3. Observe Lubrication Symbols
- 1.10.4. Alternative and Synthetic Lubricants
- 1.10.5. First 10 Hours
- 1.10.6. Every 10 Hours
- 1.10.7. Every 50 Hours
- 1.11. Troubleshooting
- 1.11.1. Hydraulic Troubleshooting
- 1.11.2. Bucket Troubleshooting
- 1.12. Service
- 1.12.1. Servicing Loader and/or Tractor Safely (Loader Attached)
- 1.12.2. Work in Clean Area
- 1.12.3. Avoid HighPressure Fluids
- 1.12.4. ORing Installation
- 1.12.5. Tightening Procedure for Fittings
- 1.12.6. Accessing Front of Tractor
- 1.12.7. Identifying Hose Connections
- 1.12.8. Check Parking Stand and Weight Bracket Engagement
- 1.12.9. Adjust Bucket Level Indicator
- 1.12.10. Metric Bolt and Screw Torque Values
- 1.12.11. Unified Inch Bolt and Screw Torque Values
- 1.13. Storage
- 1.13.1. Prepare Loader for Storage
- 1.13.2. Store Loader and Attachments
- 1.14. Specifications
- 1.14.1. Non SelfLeveling Loader Specifications on 4R Series Tractors(Specifications and design subject to change without notice)
- 1.14.2. Mechanical SelfLeveling Loader Specifications on 4R Series Tractors(Specifications and design subject to change without notice)
- 1.14.3. Non SelfLeveling Loader Specifications on 4X20 Series Tractors(Specifications and design subject to change without notice)
- 1.14.4. Mechanical SelfLeveling Loader Specifications on 4X20 Series Tractors(Specifications and design subject to change without notice)
- 1.14.5. Bale Spear Handling Capacities
- 1.15. Assembly
- 1.15.1. Perform Predelivery Service Safely
- 1.15.2. Installation Instructions Available Online to John Deere Dealers
- 1.15.3. Prepare For Assembly
- 1.15.4. Recommended Set Up/Assembly Sequence
- 1.15.5. Prepare the Tractor
- 1.15.6. Prepare the Loader
- 1.15.7. Install Bucket/Attachment
- 1.15.8. Attach Loader to Tractor
- 1.15.9. Final Inspection and Adjustments
- 1.15.10. Install Optional Equipment/Attachments
- 1.16. John Deere Service Keeps You On The Job
- 1.16.1. John Deere Is At Your Service
- 2. Page Number
- 2.1. Section 05
- 2.2. Section 10
- 2.3. Section 15
- 2.4. Section 20
- 2.5. Section 25
- 2.6. Section 30
- 2.7. Section 35
- 2.8. Section 40
- 2.9. Section 45
- 2.10. Section 50
- 2.11. Section 55
- 2.12. Section 60
- 2.13. Section 65
- 2.14. Section 70
- 2.15. Section 75
- 2.16. Section 80




