Description
-
Model List:
- Timberjack 870B Harvester
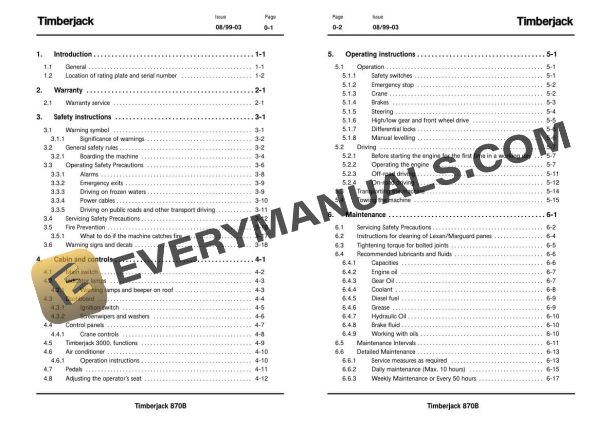
- 1. Introduction
- 1.1. General
- 1.2. Location of rating plate and serial number
- 2. Warranty
- 2.1. Warranty service
- 3. Safety instructions
- 3.1. Warning symbol
- 3.1.1. Significance of warnings
- 3.2. General safety rules
- 3.2.1. Boarding the machine
- 3.3. Operating Safety Precautions
- 3.3.1. Alarms
- 3.3.2. Emergency exits
- 3.3.3. Driving on frozen waters
- 3.3.4. Power cables
- 3.3.5. Driving on public roads and other transport driving
- 3.4. Servicing Safety Precautions
- 3.5. Fire Prevention
- 3.5.1. What to do if the machine catches fire
- 3.6. Warning signs and decals
- 4. Cabin and controls
- 4.1. Main switch
- 4.2. Indicator lamps
- 4.2.1. Warning lamps and beeper on roof
- 4.3. Dashboard
- 4.3.1. Ignition switch
- 4.3.2. Screenwipers and washers
- 4.4. Control panels
- 4.4.1. Crane controls
- 4.5. Timberjack 3000, functions
- 4.6. Air conditioner
- 4.6.1. Operation instructions
- 4.7. Pedals
- 4.8. Adjusting the operators seat
- 5. Operating instructions
- 5.1. Operation
- 5.1.1. Safety switches
- 5.1.2. Emergency stop
- 5.1.3. Crane
- 5.1.4. Brakes
- 5.1.5. Steering
- 5.1.6. High/low gear and front wheel drive
- 5.1.7. Differential locks
- 5.1.8. Manual levelling
- 5.2. Driving
- 5.2.1. Before starting the engine for the first time in a working day
- 5.2.2. Operating the engine
- 5.2.2.1. Starting the Engine
- 5.2.2.2. Cold Weather Starting
- 5.2.2.3. After starting
- 5.2.2.4. Turning off the Engine
- 5.2.3. Offroad driving
- 5.2.4. Onroad driving
- 5.3. Transporting the machine
- 5.4. Towing the machine
- 5.4.1. How to Release the Parking Brake
- 5.4.2. How to Release the Power Transmission System
- 5.4.3. How to Release the Service Brake
- 5.4.4. How to Release the Steering
- 6. Maintenance
- 6.1. Servicing Safety Precautions
- 6.2. Instructions for cleaning of Lexan/Marguard panes
- 6.3. Tightening torque for bolted joints
- 6.4. Recommended lubricants and fluids
- 6.4.1. Capacities
- 6.4.2. Engine oil
- 6.4.3. Gear Oil
- 6.4.4. Coolant
- 6.4.5. Diesel fuel
- 6.4.6. Grease
- 6.4.7. Hydraulic Oil
- 6.4.8. Brake fluid
- 6.4.9. Working with oils
- 6.5. Maintenance Intervals
- 6.6. Detailed Maintenance
- 6.6.1. Service measures as required
- 6.6.2. Daily maintenance (Max. 10 hours)
- 6.6.3. Weekly Maintenance or Every 50 hours
- 6.6.4. Every 250 Running Hours
- 6.6.5. Every 500 Running Hours
- 6.6.6. Every 1000 Running Hours
- 6.6.7. Every 2000 Running Hours
- 6.7. Welding Instructions
- 6.8. Wheels
- 6.8.1. Changing wheels
- 6.8.2. Antislip fitting
- 7. Hydraulic system
- 7.1. Working hydraulics system
- 7.2. Transmission system
- 7.3. Hydraulic reservoir
- 7.3.1. Filling with hydraulic fluid
- 7.3.2. Draining the hydraulic fluid
- 7.4. Vacuum pump
- 7.5. Working Hydraulics How to Check and Adjust the Pressures
- 7.5.1. Checking the servo pressure, working hydraulics
- 7.5.2. Adjusting the servo pressure
- 7.5.3. Checking the working hydraulics pump
- 7.5.4. Setting the pressure difference p of the pump
- 7.5.5. Chock valve
- 7.5.6. Checking and adjusting the backfill valve
- 7.6. Check and Adjust the Hydrostatic System
- 7.6.1. Checking the supply pressure valve Transmission pump
- 7.6.2. Adjusting the supply pressure transmission pump
- 7.6.3. High pressure
- 7.6.4. Checking the high pressure, forward/reverse
- 7.6.5. Adjusting the drive pressure
- 7.6.6. Starting point of the hydraulic motor
- 7.7. Checking the brakes
- 7.7.1. Adjusting the brakes
- 7.7.2. Checking pressure of the brake valve
- 7.7.3. Checking the driving brake
- 7.7.4. Checking the working brake
- 7.7.5. Checking the charging and relief zone
- 7.7.6. Bleeding the brakes
- 7.7.7. Bleeding the brake pedal
- 7.7.8. Setting the brake pedal
- 7.8. Hydraulic diagrams
- 7.8.1. Crane hydraulics
- 7.8.2. Working and brake hydraulics
- 7.8.3. Transmission hydraulics
- 7.8.4. Optional equipment
- 8. Electrical system
- 8.1. Batteries
- 8.2. Main switch andfuses
- 8.2.1. Fuse box F1 right
- 8.2.2. Fuse box F2 left
- 8.3. Light bulbs
- 8.4. Repair welding
- 8.5. Wiring Diagram
- 9. Transmission
- 9.1. General
- 9.1.1. Rear axle and gearbox
- 9.1.2. Front axle
- 9.1.3. Hub gearing
- 9.1.4. Brakes
- 10. Crane
- 10.1. Tj 170 H 90
- 10.2. Tj 170 H 97
- 11. Equipment
- 11.1. Air conditioner
- 11.1.1. Danger and precautions
- 11.1.2. Location of the air conditioner
- 11.1.3. System configuration
- 11.1.4. Weekly care and maintenance
- 11.1.5. Monthly care and maintenance
- 11.1.6. Troubleshooting the air conditioner
- 11.2. Engine and cab heater
- 11.2.1. General
- 11.2.1.1. Connecting
- 11.2.1.2. Heating
- 11.2.1.3. Switching off
- 11.2.1.4. Safety devices
- 11.2.1.5. Correction of malfunction
- 11.2.2. Care and maintenance
- 11.2.3. Timer for engine and cab heater
- 11.2.3.1. Setting the timer
- 11.2.3.2. Direct starting of heater without preselection
- 11.2.3.3. Disconnection
- 11.2.3.4. Preselection of heating start
- 11.2.3.5. Advice in event of malfunctioning
- 11.3. Sprinkler installation
- 11.3.1. Control unit
- 11.4. Handheld fire extinguishers
- 11.5. Stump treatment system
- 12. Technical data